Introduction
Installing this service pack is very similar to previous service packs and CU updates but there are a few things you should be aware of. In this blog post, I’ll walk you through the upgrade process step-by-step in a SCCM 2012 R2 standalone primary scenario.
As always, you should start by checking the health of the system, verify the backup, etc.
At a minimum, you should check the following:
- Install any missing updates (security, critical and important).
- Verify you don’t have a pending restart.
- Verify that you have a valid SQL backup.
- Test that the site database can be upgraded (Setup.exe /TESTDBUPGRADE)
- Verify that the current installation of ConfigMgr is healthy.
- Verify that ConfigMgr 2012 R2 has been installed.
- Verify that Windows ADK for Windows 8.1 is installed.
Download the update
After we have checked that the system is healthy, we need to download the update. SCCM 2012 SP2 / R2 SP1 is available for download here: https://www.microsoft.com/en-us/evalcenter/evaluate-system-center-2012-r2-configuration-manager-and-endpoint-protection.
The only version available today is the “Evaluation version”, but Microsoft doesn’t make dedicated Eval editions of Configuration Manager, so if you plan to upgrade an existing environment, you should be just fine using this version.
This update can be applied directly to the following Systems/Roles:
- The Central Administration Site (CAS)
- Primary Site
- Secondary Site
- SMS Provider
- Configuration Manager Console
Update the Site Primary Site Server
To start the installation, log on to the Primary Site Server and run “Splash.hta “. The default settings should be ideal for most customers.
Note: You can follow the installation process in the “C:\ConfigMgrSetup.log” file.
On the Welcome Screen, click Install.
Review the “Before You Begin” Page and click Next.
On the Getting Started page, verify that “Upgrade this Configuration Manager site” is selected, and click Next.
Accept the license terms and click Next.
Accept all the license terms for the additional software and click Next.
On the Prerequisite Downloads, click Browse, and specify the path where you want to save the prerequisite files. Click Next.
Grab some coffee while the updated files are downloading.
On the Server Language Selection page you should just accept the default settings. Since this is an upgrade, your existing configuration should be the default selection. Click Next.
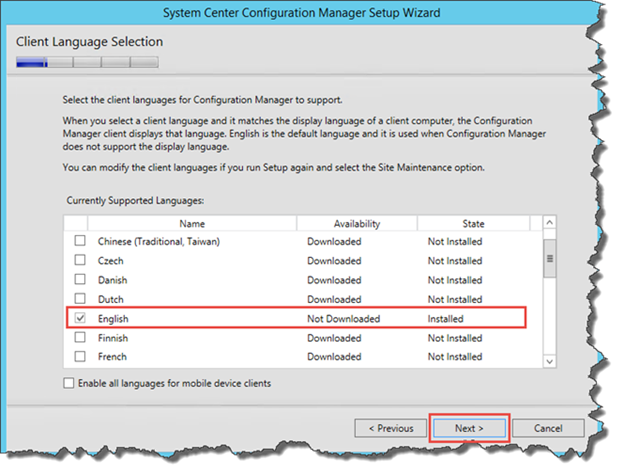
That’s also the case for the Client Language Settings, so just accept the default selection, and click Next.
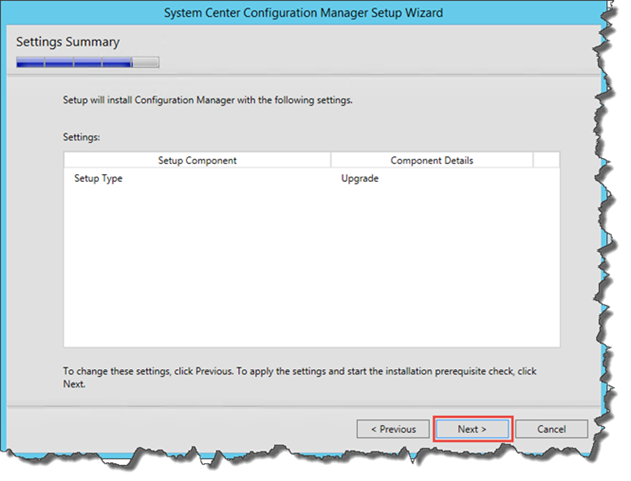
Hey… It looks like we’re finally ready to get this thing started… Click Next.
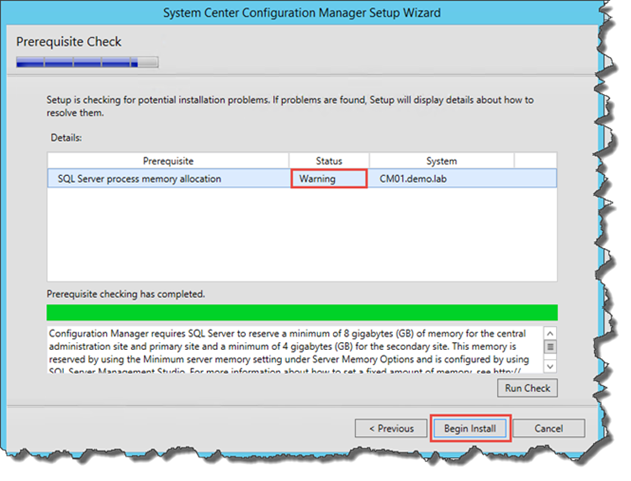
Well… Almost. First we need to make sure that our system is healthy and is ready to upgrade. In my case I’m a little low on memory, but since this is my test lab with less than 10 clients, I’m really not worried, so I’ll click Begin Install.
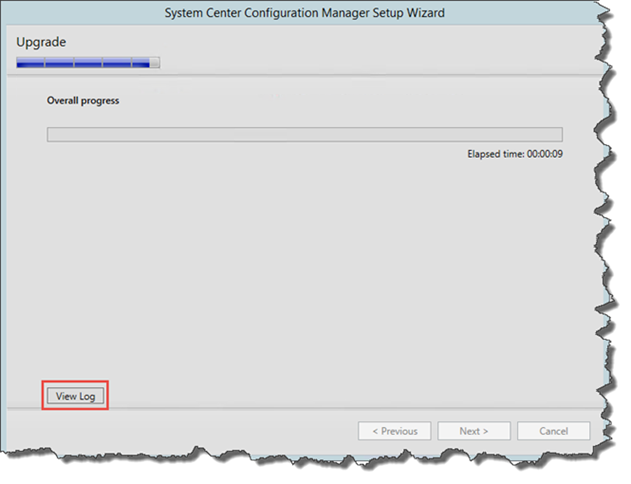
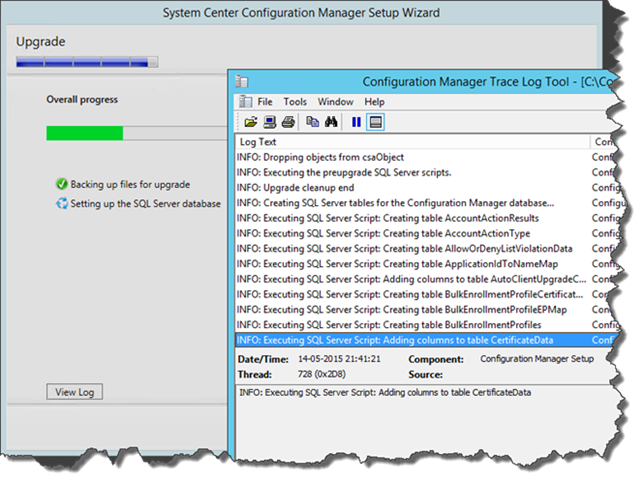
On the Upgrade page, make sure to click “View Log”. This will open the setup log file and allow you to monitor the process as we move forward.
As promised… Much more fun in here ![]()
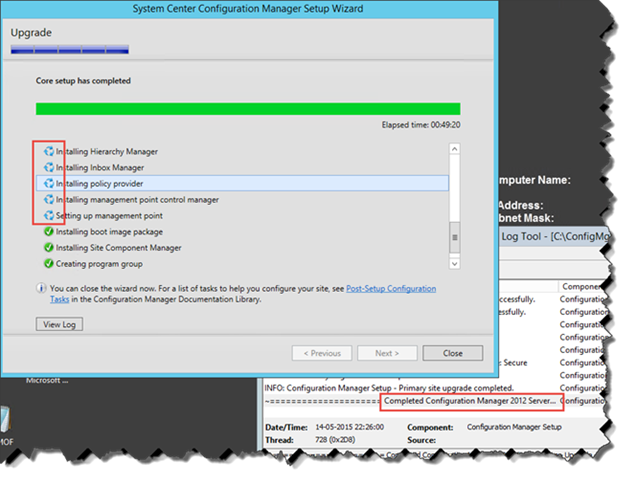
Finally the upgrade is complete (In my lab, it took 49 minutes) and so far everything looks great. Looking in the log file we can see that the process is complete, but the UI is not always (rarely) updated when the Upgrade is complete. After reviewing the log file, click OK.
Verify that the setup was successful
After the setup is complete, there are a few things you can and should do to verify that the setup was successful.
The first thing you should do is check the log file. But if you followed this guide, you have already done that. ![]()
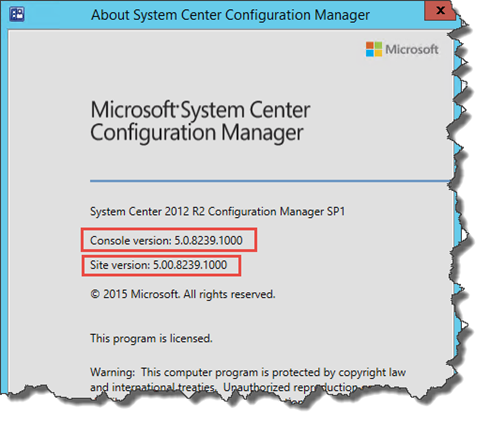
The next thing you should do is Launch the System Center 2012 R2 Configuration Manager Console directly on the Site Server and verify the build number of the console. If the upgrade was successful, the build number should be 5.0.8239.1000.
Also note that you can now see the version number of the site server here too.
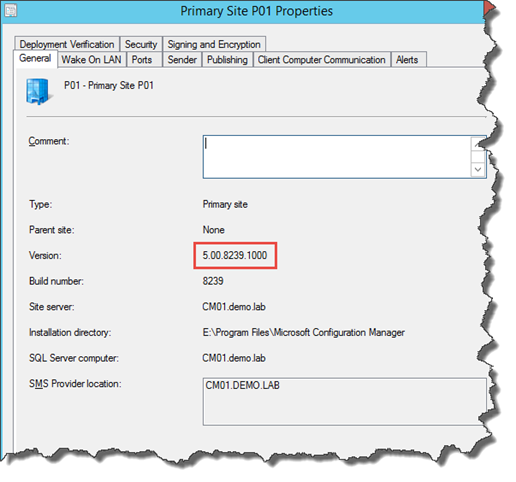
If you right-click and select “Properties” of the Primary Site to check the version number, you will notice that the build number is 5.00.8239.1000 (R2 SP1 RTM).
An overview of all versions and build numbers can be found here: https://www.ronnipedersen.com/2014/07/configmgr-2012-versionbuild-numbers/
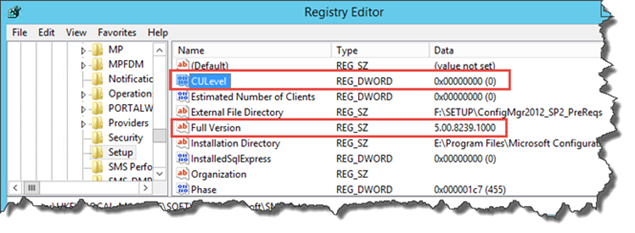
For additional verification, you may also check the CULevel registry data under HKLM\Software\Microsoft\SMS\Setup\. If the upgrade was successful, the value should now be “0”.
Updating Clients
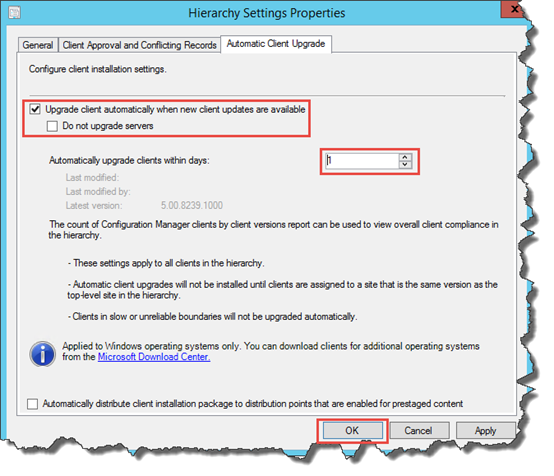
You can upgrade the clients using many different methods, but in this example, I’ll go for the Automatic Client Upgrade feature. Since this is a very small lab, I’ll set the maximums days to 1.
If you want to learn more about this feature and how it works, you should check out this blog post:
https://www.ronnipedersen.com/2014/08/sccm-2012-how-does-automatic-client-upgrade-work/
Monitoring the client upgrade process
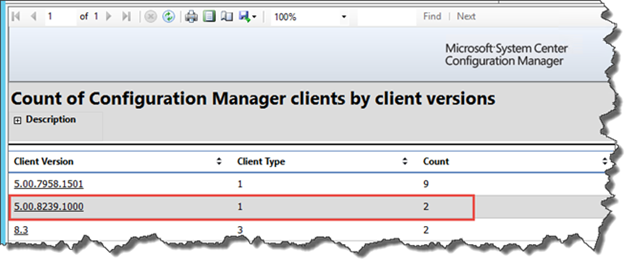
There are many ways to monitor the client upgrade process, but I prefer to use the built-in report that shows the count of System Center Configuration Manager Clients by Client Version.
That’s it…
Next week, I’ll start to upgrade customers to this new Service Pack. As I move along and learn more, I’ll update this post with my newfound knowledge.
Until next time….


12 Comments
I would definitely run setup.exe /testdbupgrade before kicking off the installation of the SP.
Oh yes!
That’s part of the “Verify that the current installation of ConfigMgr is healthy” step 🙂
I did think about going through all the steps in details, but rand out of time.
If I get enough time next week, I might do it 🙂
I would wait upgrading clients til somebody have figured this one out
https://social.technet.microsoft.com/Forums/en-US/90ead8bd-9f13-40f4-999d-e7aca1b78156/sccm-2012-r2-sp1-after-upgrade-clients-no-certificate-sms-provider-error?forum=configmanagergeneral
I have the same errors after an otherwise uneventfull upgrade.
Could you post how you would create a packageprogram to upgrade the client instead of the automatic process?
Hi,
Good article. i have tested with my lab & ran setup.exe /testdbupgrade, it ran successfully. but in setup setting “Upgrade this Configuration Manager Site” is grayed out. its not enable. I searched for solution, but i unable to get it.
Please give me your suggestion.
When I run splash.hta I only get 1 empty window. No install button for me, how can I fix this?
extracting the files at the server itsself fixed the issue.
Thanks for sharing the solution/fix here 🙂
Sounds like an explorer or browser problem. Never seen that before. Try to run the hta as an Admin.
After installing SP1 should I also install Cumulative Update 1 (CU1)?
Just upgraded my sites with SP2 – had to upgrade secondary sites from primary site as running from splash.hta gave no option to upgrade. Otherwise went smoothly. Applied CU1 afterwards with no issues.
I have looked everywhere and cannot find anyone else having this problem:
I am trying to install SCCM 2012 SP2 from scratch before upgrading to SCCM 2012 R2 SP1. All pre-reqs are in place but the pre req checker flat out fails every time it checks for ADK 8.1. I have uninstalled and re-installed, re-downloaded from Microsoft but no matter what I’ve tried, it still fails on USMT, Deployment Tools and Windows Pre-installation environment checks. its ADK 8.1 version 8.100.26866, I can’t find any previous versions in case it’s the build that’s broken and I really don’t want to rebuild the server from scratch..
I’m installing SCCM on a separate drive to C: and in an SQL instance. It is a standalone primary site all on the same server. I have the no sms drive files on all drives except the one I want it to be installed on. I honestly have no idea what’s wrong with it.